Dessert Presentation Tips start with understanding that visual appeal matters just as much as taste. Great presentation turns a simple dessert into something memorable.
Most home cooks focus only on flavor and skip the visual impact. This leaves money and wow-factor on the table.
By the end you will know the plating techniques, color principles, and garnishing methods that make desserts look professional and Instagram-worthy.
TL;DR
- People eat with their eyes first – 83% of food decisions happen within 90 seconds of seeing a dish.
- White plates make colors pop better than colored plates for most desserts.
- Three elements create professional presentation: height, texture contrast, and a clear focal point.
- Cold plates and utensils keep frozen desserts from melting during plating.
Dessert Presentation Tips That Work Every Time
Great dessert presentation follows simple rules that anyone can learn. Start with a clean plate and work from there.
The plate is your canvas and the dessert is your paint. Think like an artist but keep it practical.
Essential Tools for Professional-Looking Desserts
You don’t need expensive equipment to make desserts look professional. Four basic tools handle most presentation needs.
Must-Have Plating Tools
- Offset spatula – smooths frosting and moves delicate items without damage
- Squeeze bottles – creates precise sauce dots and drizzles
- Pastry brush – adds glazes and removes crumbs from plates
- Fine-mesh sieve – dusts powdered sugar evenly
Choosing the Right Plates and Surfaces
White plates work best for most desserts because they don’t compete with colors. Round plates give you more space to work with than square ones.
Dark plates work well for light-colored desserts like vanilla panna cotta. Glass plates show off layered desserts perfectly.
| Plate Type | Best For | Why It Works |
|---|---|---|
| White ceramic | Colorful fruit desserts | Makes colors pop |
| Black slate | Light desserts | Creates contrast |
| Clear glass | Layered desserts | Shows all layers |
| Wooden board | Rustic desserts | Adds warmth |
Color and Texture Principles That Always Work
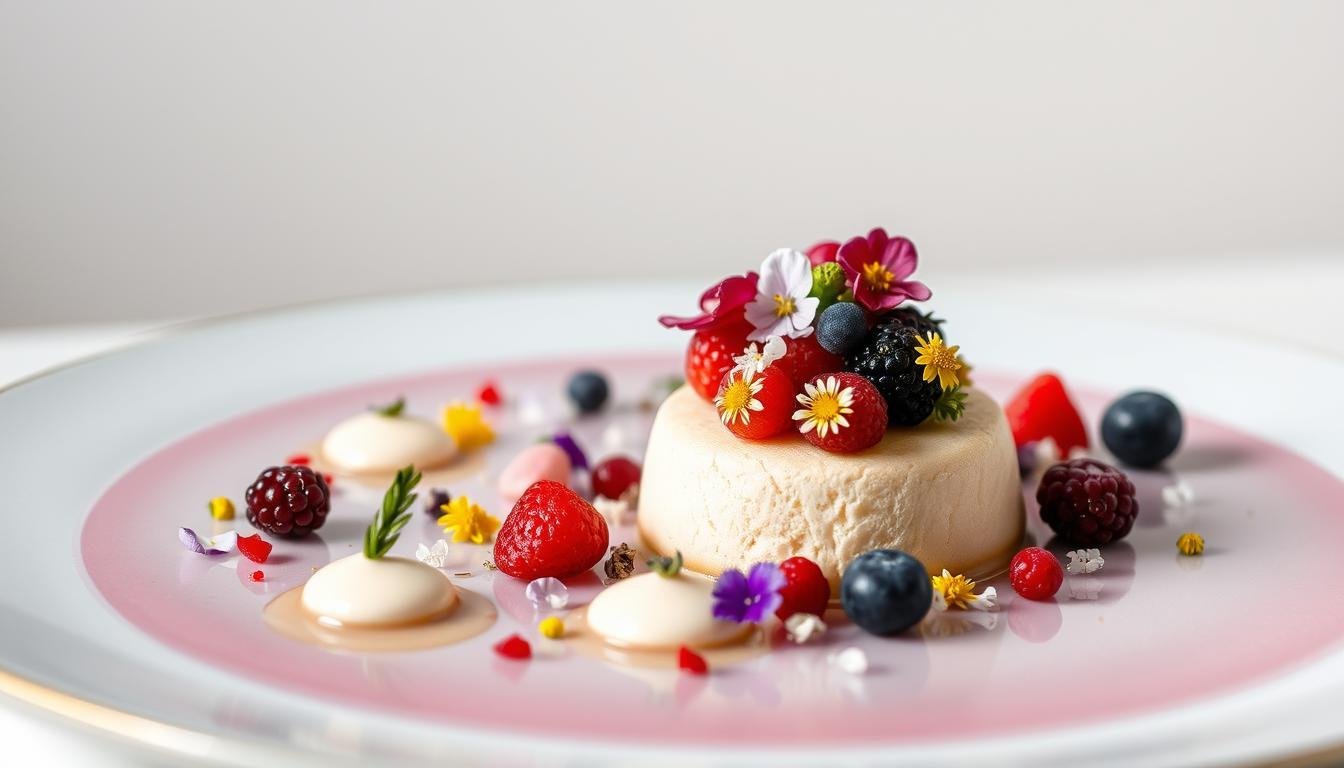
Color contrast makes desserts look more appetizing. Red strawberries on white cream creates instant visual appeal.
Texture contrast adds interest even when colors are similar. Smooth custard with crunchy nuts keeps eyes engaged.
Working with Color Combinations
Complementary colors sit opposite each other on the color wheel and create natural contrast. Orange and blue, red and green, yellow and purple all work well together.
Monochromatic color schemes use different shades of the same color. This creates elegant, sophisticated looks that photograph beautifully.
Creating Texture Interest
Mix smooth and rough textures on every plate. Creamy elements pair with crunchy garnishes naturally.
Height adds drama to any dessert presentation. Stack components or use stands to create levels.
The Three-Point Rule for Perfect Balance
Place elements in groups of three to create visual balance that feels natural to the eye.
- Three different heights create dynamic movement
- Three colors maximum keeps presentations clean
- Three textures give enough variety without chaos
Specific Techniques for Different Dessert Types
Each type of dessert needs its own approach. What works for cake doesn’t work for ice cream.
Plating Cakes and Layer Desserts
Cut clean slices with a warm, dry knife between each cut. Wipe the blade completely clean every time.
Place the slice slightly off-center on the plate to leave room for garnishes. Add sauce or fruit on the empty space, not on top of the cake.
Styling Ice Cream and Frozen Treats
Chill plates in the freezer for 10 minutes before plating. Cold surfaces slow melting and give you more working time.
Scoop ice cream with a warm scoop dipped in hot water. Shape quenelles by dragging a warm spoon through soft ice cream.
Presenting Puddings and Custards
Serve individual puddings in clear glasses to show off colors and layers. Mason jars work great for casual presentations.
Float garnishes on top rather than mixing them in. This keeps colors separate and textures distinct.
Garnishing Techniques That Add Professional Polish
Simple garnishes make the biggest impact when done well. Creative dessert plating starts with choosing garnishes that match the dessert’s flavors.
Edible Flowers and Fresh Herbs
Pansies, violas, and nasturtiums add color without strong flavors. Mint, basil, and lavender work when their taste complements the dessert.
Place flowers and herbs at the last second to prevent wilting. Pat them dry with paper towels first.
Sauce Work and Drizzles
Make dots with squeeze bottles and drag a toothpick through them for heart shapes. Practice this technique on a clean plate first.
Drizzle sauces from height to create thin, even lines. Move your hand steadily across the plate without stopping.
Chocolate and Sugar Decorations
Chocolate shavings come from running a vegetable peeler along a room-temperature chocolate bar. Curls form when the chocolate is slightly warm.
Caramelized sugar creates golden threads when drizzled from a fork. Work quickly because sugar hardens fast.
Common Mistakes That Ruin Dessert Presentation
Overcrowding plates makes desserts look messy instead of abundant. Leave empty space around each element.
Fingerprints on plate rims look unprofessional. Wipe edges clean before serving every single time.
Avoiding Sauce and Garnish Problems
Sauces that soak into cake make presentations look sloppy. Add sauce to the plate first, then place the cake on top.
Wilted garnishes signal poor timing. Add fresh elements right before serving, never in advance.
Looking for more ways to improve your dessert game? Check out these beginner-friendly dessert recipes that focus on easy techniques with impressive results.
Frequently Asked Questions
What are some essential tools for dessert presentation?
An offset spatula, squeeze bottles, pastry brush, and fine-mesh sieve handle most presentation needs. White plates work best for showing off colors.
How can I make my desserts look more professional?
Use the three-point rule for balance, keep plates clean, and add garnishes at the last second. Practice sauce work on empty plates first.
What colors work best for dessert presentation?
Complementary colors like red and green create natural contrast. Monochromatic schemes using different shades of one color look elegant and sophisticated.
How do I prevent ice cream from melting during plating?
Chill plates in the freezer for 10 minutes before use. Use warm scoops and work quickly in a cool kitchen.
What garnishes work with most desserts?
Fresh berries, mint leaves, and powdered sugar work with almost any dessert. Choose garnishes that complement the dessert’s flavor profile.
Final Thoughts
Dessert Presentation Tips are skills that improve with practice and make every dessert more special. Start with clean plates and simple garnishes.
Focus on one technique at a time until it becomes natural. Your desserts will look professional long before you feel like a professional.


From beginner-friendly tips to no-fuss dessert ideas, Ryan is all about helping people enjoy baking and treat-making without the stress. Whether you’re whipping up something for a party or just craving something sweet, Ryan’s practical approach makes it easy to create desserts that taste great and don’t take all day.